In this blog we will discuss about a very demanding requirement of users in which they demand about various posting groups related to a single vendor/customer.
For example, let assume that a vendor supplies us both materials and services before this update in business central we have choice of selecting only one posting group at the time of master creation.
But now we can select multiple posting groups for a single master (vendor/customer) we can use it at the time of posting relevant documents regarding to that master(vendor/customer).
In this bog we will briefly discuss about the various setups to be done for our requirement and, we use the functionality for posting of documents.
Firstly, we will discuss about the purchase related setups then we will go to sales related setups along with the postings.
FOR PURCHASE
STEP1: - Seach “Purchases & Payables Setup” in Business Central.

STEP2: - Purchases & Payables Setup page will open.

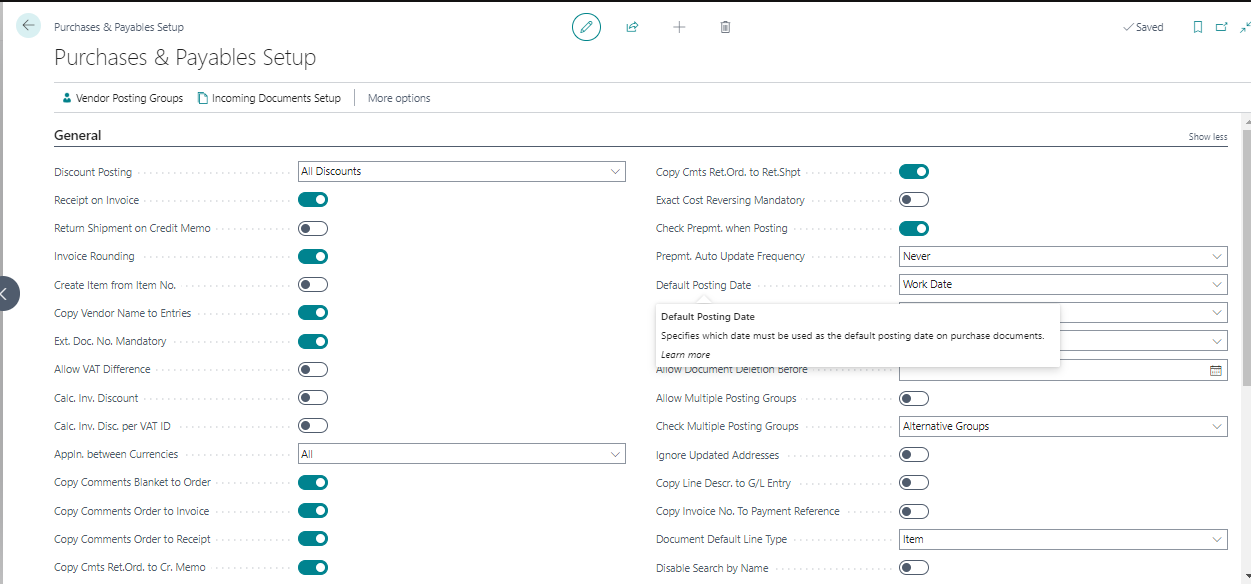
STEP3: - Here we can see that “Allow Multiple Posting Groups” is available which we have to Enable.

Now we have enabled the allow multiple posting groups for vendor as this is purchases & payables setup.
STEP4: - Search “Vendor Posting Groups” in business central. On this page we will define the alternative posting groups for the required one. For example, if the vendor has posting group of Domestic and we want to add “Alternative posting groups” as Services then we will define it here.

STEP5: - Vendor Posting groups page will open. We will select the Domestic (Posting Groups).

STEP6: - After selecting the line then we go to Navigate and select Related Tab> Posting Groups> Alternative Groups.

When we click on the Alternative Groups a new page will open.
STEP7: - On the new page we will define the alternative vendor posting Groups which we want to use for the selected one here in our case its Services. We can define multiple Alternative vendors posting groups on this page if we want to.

STEP8: - Now we go to vendor and select the vendor for which we want to use the functionality.
- For that search vendors in business central.

- Vendor list will open.

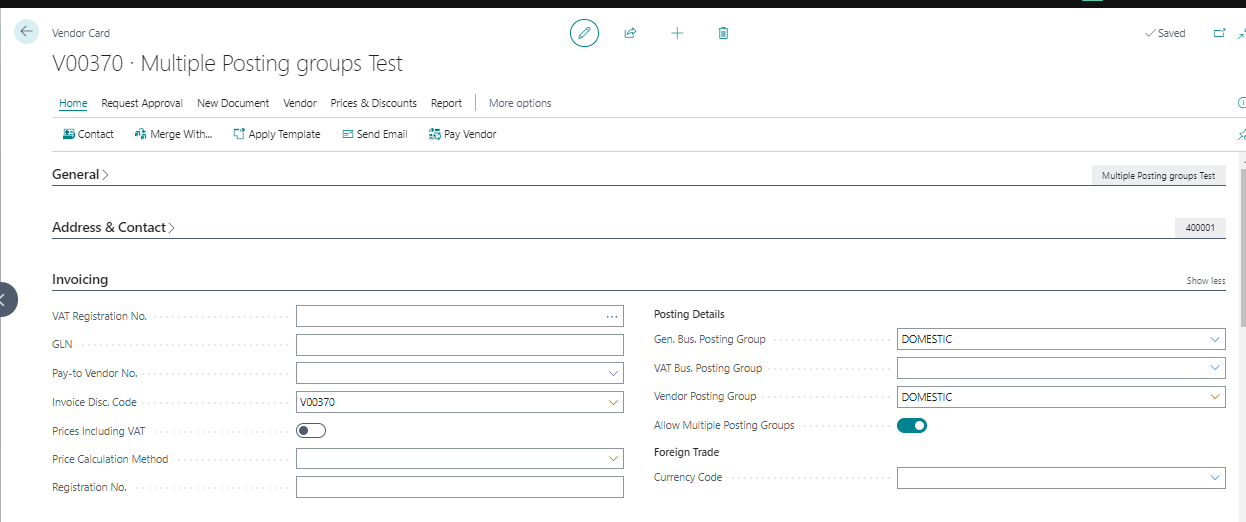
- Select the vendor for which you want to use this functionality and in the invoicing tab we are going to enable the “Allow Multiple Posting Groups” by this we have defined that this vendor is supplying multiple things like materials and services.

Depending on the type of invoice related to this vendor we can select posting group at the time of invoice posting.
For our reference we will create an invoice for this vendor and see the functionality working.
STEP9: - Search “Purchase Invoices” in business central.

STEP10: - Purchase Invoices List will open.

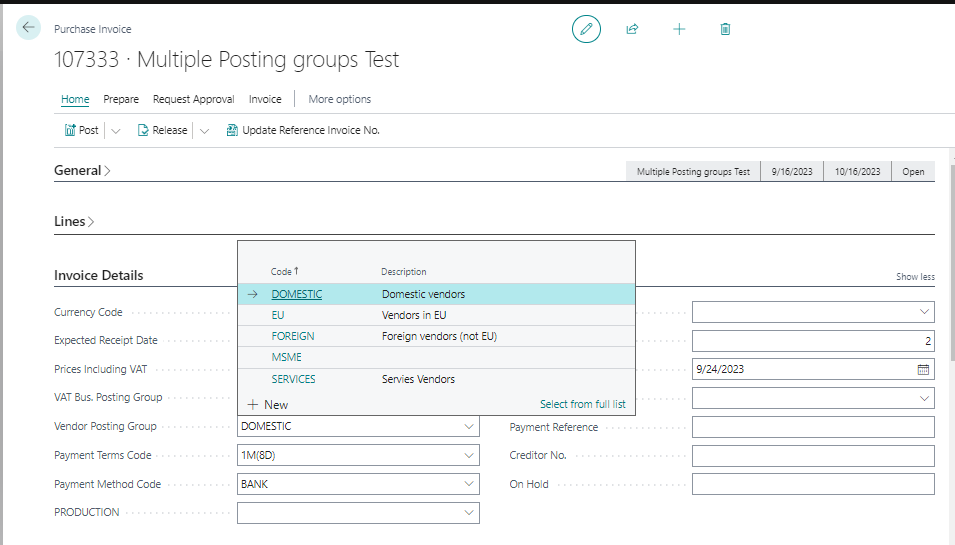
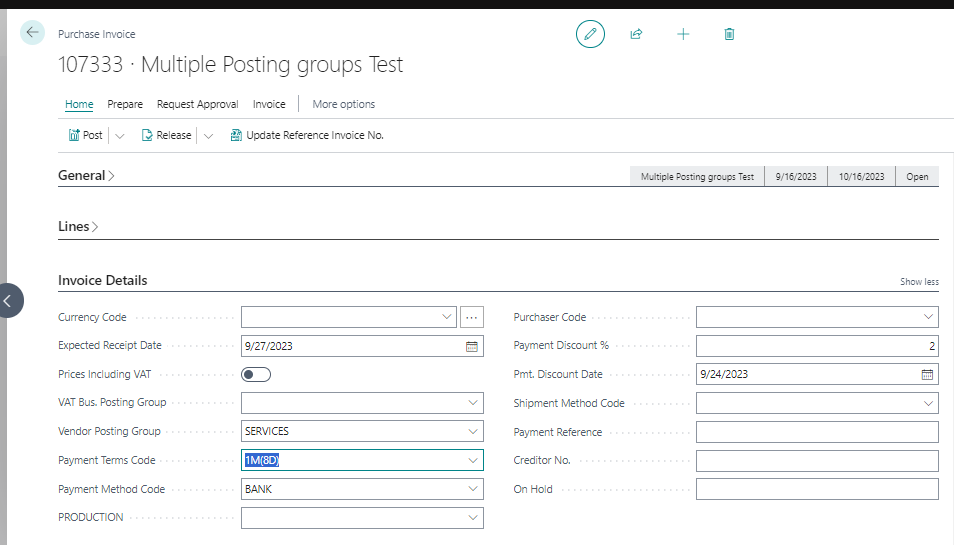
STEP11: - Create new invoice by clicking on New a new window will open. Select the desired vendor. Fill the appropriate details we can see that in the invoicing tab we can change the Vendor Posting groups from Domestic to Services.
By default, the vendor posting groups will come as Domestic.

As we have selected services, we can change the Vendor posting groups to Services.

***NOTE***: - Same process can be followed for sales. For that the setups will be of sales which are given below.
- Sales & Receivables Setup
- Customer Posting Groups
- Master (Customer)