Introduction
Hi readers today we are going to explore the Document sending profiles in Business Central, It’s play a pivotal role in managing and customizing how documents, such as invoices, purchase orders, or statements, are distributed to customers or vendors. These profiles streamline communication, ensuring accuracy and efficiency in sending essential business documents. Let's delve deeper into this integral aspect of Business Central.
About Configuration of Profiles
Document sending profiles are configurations within Business Central that define how documents are sent to customers, vendors, or other recipients. These profiles specify the method of delivery, such as email or print, and the format of the documents being sent, enabling businesses to streamline their communication processes.
Key Components of Document Sending Profiles
Document Type: Profiles can be set up for various types of documents, including invoices, purchase orders, credit memos, and more.
Delivery Method: It defines how the document is sent. Options typically include email, print, or both.
Recipient Information: Specifies details about the recipients, such as their email addresses or postal addresses.
Document Formats: Allows customization of the document format, like PDF or XML.
Message Templates: Enables the use of predefined message templates for emails accompanying the documents.
Benefits of Using Document Sending Profiles
Efficiency: Profiles streamline the process of sending documents by automating tasks and reducing manual intervention.
Customization: Businesses can tailor document formats and messages based on recipient preferences.
Consistency: Ensures uniformity in document delivery, maintaining the company's brand and professionalism.
Time-saving: Automates repetitive tasks, saving time for employees to focus on more critical aspects of the business.
Setting Up Document Sending Profiles in Business Central
Accessing Document Sending Profiles: Navigate to the relevant module (e.g., Sales or Purchase), locate the relevant setup options, and select "Document Sending Profiles."
Creating a New Profile: Navigate to the Document sending profile and create the profile.
Under sending Option Printer and Email options are available but most common use is for Email for sending the Documents to stakeholders.
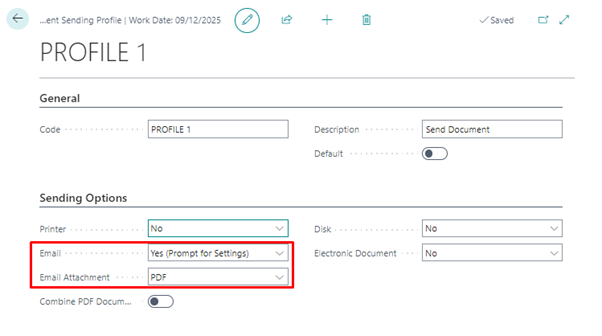
Fields information of sending Options,
Printer: Specifies if and how the document is printed when you choose the Post and Send button. If you choose the Yes (Prompt for Settings) option, the document is printed according to settings that you must make on the printer setup dialogue.
Email: Specifies if and how the document is attached as a PDF file to an email to the involved customer when you choose the Post and Send button. If you choose the Yes (Prompt for Settings) option, the document is attached to an email according to settings that you must make in the Send Email window.
Assign the Profiles
Assign the profile to Customer for the testing purpose and also make sure the mail id for the customer is available on Email field or else need to define of Document Layout page as explain below,
Contact mail ID is also available so it will send the document to Contact mail ID.
(You can assign the profiles to Vendors also)
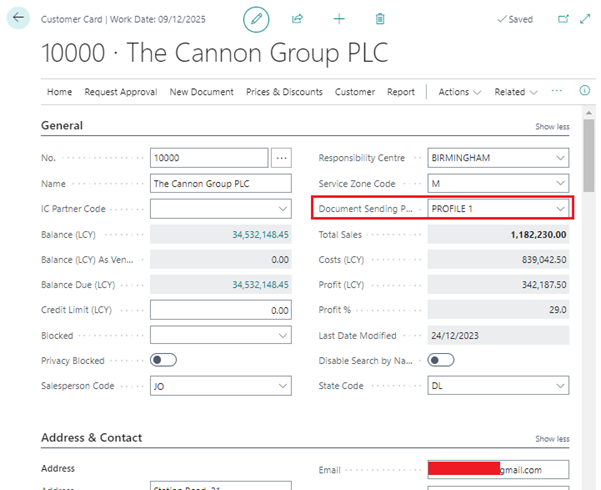
You can define the Document Layout for types of transaction from the Document Layout Option.

Document Layout page,
If we do not define then reports here then system took the standard reports and mail body for the transaction.
In this case will not going to define anything here lets go with the standard reports.

After completion of assigning the Profiles.
Post & Send
Create and Sales Order/Invoice for the Customer we have assign the Profile as below,
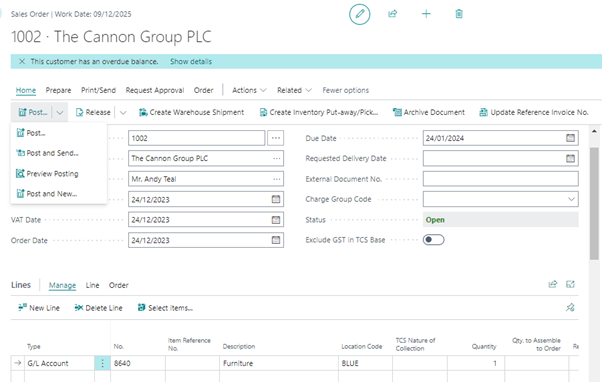
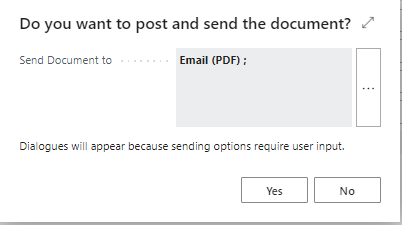
After click on “Post and Send” button the below confirmation required, click on Yes to proceed.
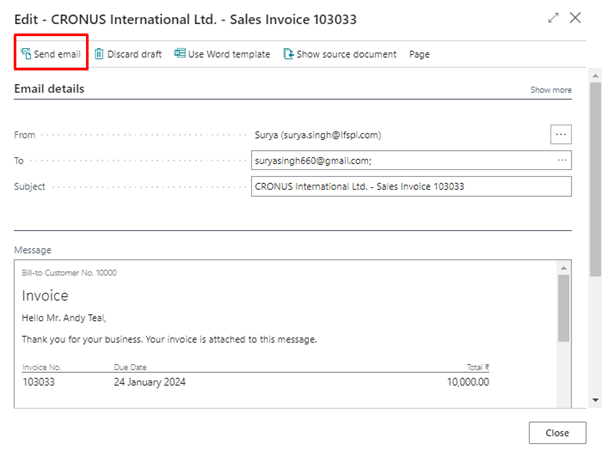
After immediate posting system popups the below Drafted mail click on Send email.
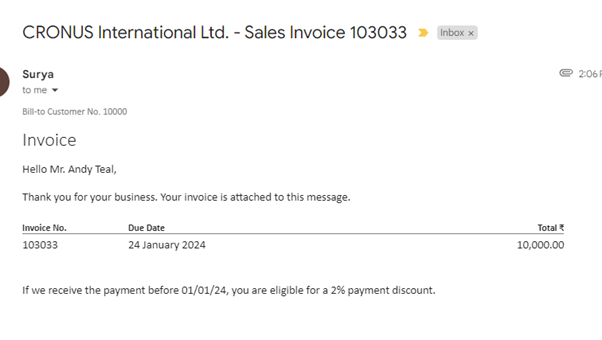
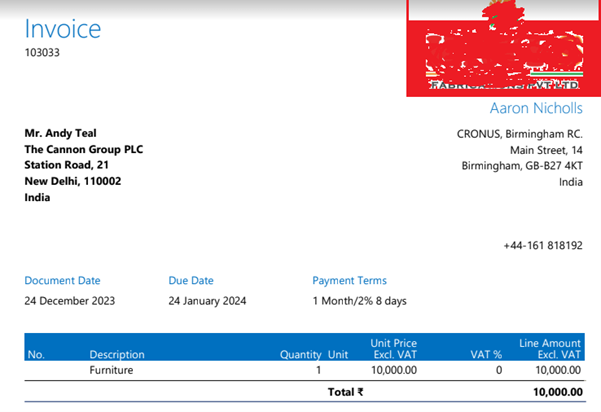
The below mail got with the attachment of Posted sales Invoice,
