What is Account Schedules in Business Centrals?
Use account schedules to get insight into the financial data stored in your chart of accounts. Account schedules in Business central analyse figures in G/L accounts and compare general ledger entries with general ledger budget entries. The results display in charts on your Home page, such as the Cash Flow chart.
Dynamics NAV/Business Central provides a few sample accounts schedules that you can use right away, or you can set up your own rows and columns to specify the figures to compare. For example, you can create account schedules to calculate profit margins on dimensions like departments or customer groups. You can create as many customized financial statements as you want.
Setting up account schedules requires an understanding of the financial data in the chart of accounts. For example, you can view general ledger entries as percentages of budget entries.
Lets Create a New Account Schedule.
Search Account Schedules on Search bar.
In the Account Schedule Names window, choose the New action to create a new account schedule name.
Fill in the fields, as necessary. Choose a field to read a short description of the field or link to more information.
Choose the Edit Account Schedule action.
In the Account Schedule window, fill in the fields, as necessary.
When you have created a new account schedule and set up the rows, you must set up columns. You can either set them up manually or assign a predefined column layout to your account schedule.
Choose the Edit Column Layout Setup action.
In the Column Layout window, fill in the fields, as necessary.
To create a column that calculates percentages.
Sometimes you may want to include a column in an account schedule to calculate percentages of a total. For example, if you have a number of rows that break down sales by dimension, you may want a column to indicate the percentage of total sales that each row represents.
- Search Account Schedules on Search bar.
- In the Account Schedule Names window, select an account schedule.
- Choose the Edit Account Schedule action to set up an account schedule row to calculate the total on which the percentages will be based.
- Insert a line immediately above the first row for which you want to display a percentage.
- Fill in the fields on the line as follows: In the Totalling Type field, enter Set Base for Percent. In the Totalling field, enter a formula for the total that the percentage will be based on. For example, if row 11 contains the total sales, enter 11.
- Choose the Edit Column Layout Setup action to set up a column.
- Fill in the fields on the line as follows:
- In the Column Type field, select Formula. In the Formula field, enter a formula for the amount that you want to calculate a percentage for, followed by %. For example, if column number N contains the net change, enter N%.
- Repeat steps 4 through 7 for each group of rows that you want to break down by percentage.
To set up account schedules with overviews.
- Search Account Schedules on Search bar.
- In the Account Schedule Names window, select an account schedule.
- Choose the Edit Account Schedule action
- In the Account Schedule window, in the Name field, select the default account schedule name.
- Choose the Insert Accounts action.
- Select the accounts that you want to include in your statement, and then choose the OK button.
- The accounts are now inserted into your account schedule. If you want, you can also change the column layout.
- Choose the Overview Dimension action.
- On the Filters Fast Tab, set the budget filter to the desired filter name.
- Choose the OK button.
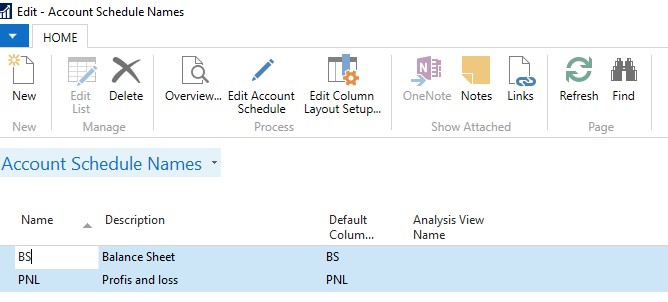
Lets take a look in Account schedule Edit and Overview
We have created PNL and Balance sheet account schedule.
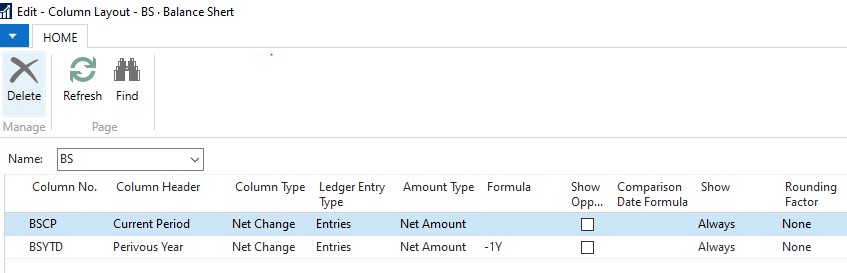
Click on Layout Setup
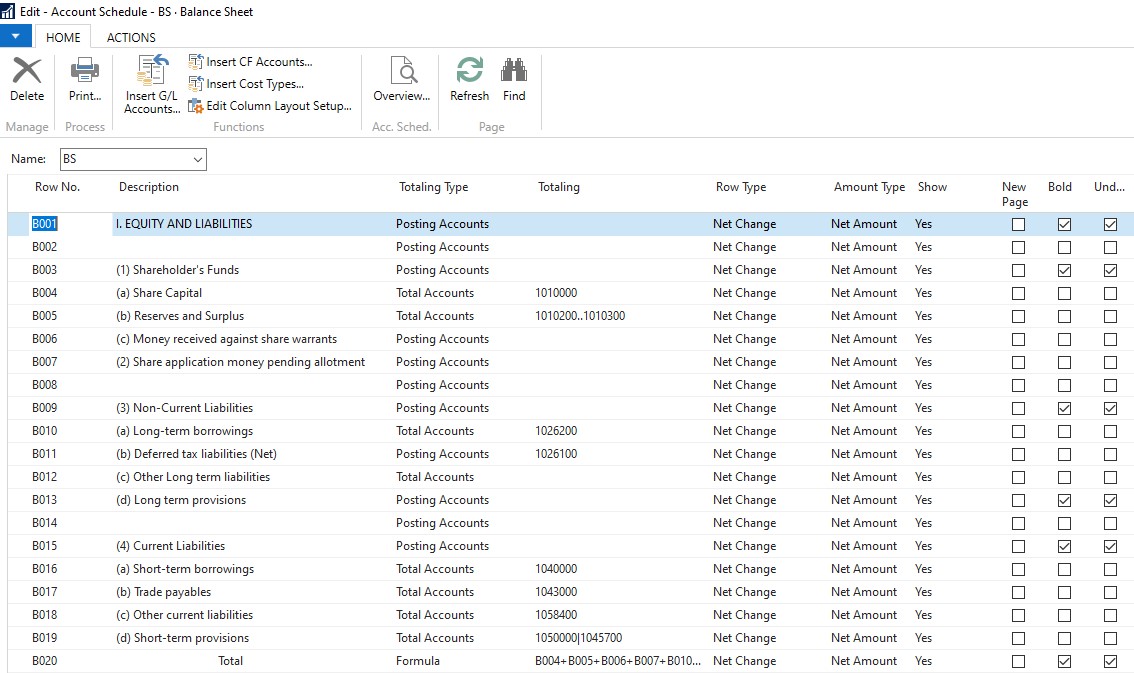
Balance sheet:
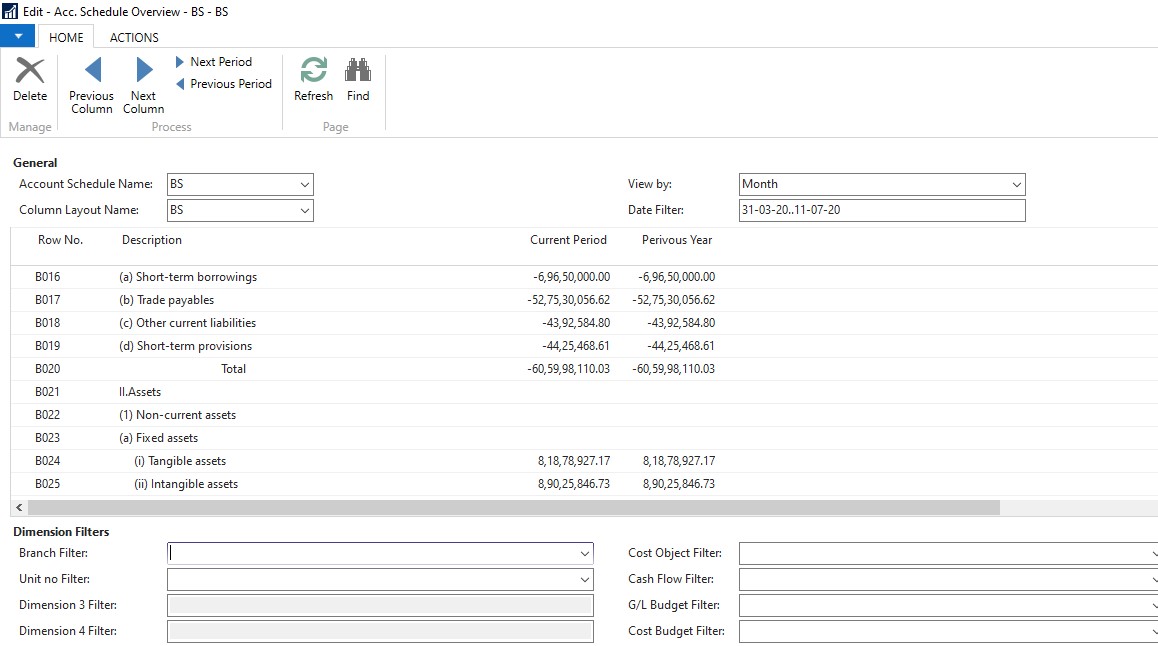
Click on Overview button
 After click Overview button
 In this way you can create multiple account schedules for MIS purpose.
Some tips on the formula to be used.
You can use the normal date formula that being used in Payment Terms.
For Financial Year FY[1] means January, this can be used in Comparision Period Formula, if you can previous year you can use (-) sign before FY
1D,3D,1W these can be used in Comparision Date Formula.